The Tax Class Screens
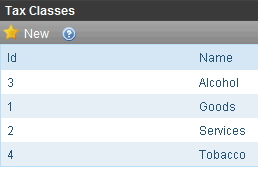
Use the Tax Class screen to define all classes of catalog entries that can be taxed. When you install eCommerce, the following tax classes are installed.
alcohol
goods
service
tobacco
You can modify or delete these, and add new classes at any time.
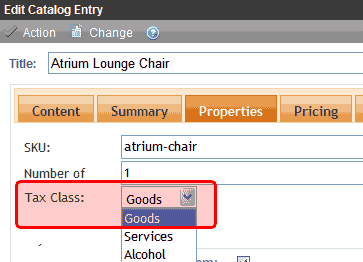
You assign a tax class to a catalog entry via its Properties tab’s Tax Class field (shown below).

See Also:
How an Order’s Tax Amount is Calculated
Creating a New Tax Class
To create a new tax class, follow these steps. See Also: The Tax Class Screens
1. Go to Settings > Commerce > Tax > Classes.

2. Choose New > Tax Class.
3. Enter the name of the tax class.
4. Press Save ( ).
).
Editing a Tax Class
To edit a tax class, follow these steps. See Also: The Tax Class Screens
1. Go to Settings > Commerce > Tax > Classes.
2. Click the Tax Class that you want to edit.
3. Click Edit ( ).
).
4. Edit the name of the tax class.
5. Press the Save button ( ).
).
Deleting a Tax Class
Warning! If a tax class has been assigned to a catalog entry that appears on any order, the Delete button does not appear.
To delete a tax class, follow these steps.
1. Go to Settings > Commerce > Tax > Classes.
2. Click the Tax Class that you want to delete.
3. Click Delete (![]() ).
).
4. A confirmation message appears. Click OK.
5. The Tax Class is deleted.
